Follow along as guest blogger, Doug Murray, goes through the process of refurbishing an old Hamilton drafting table found in a barn! This is part 2, so make sure you see his first post.
Stain and varnish removal is no fun at all! When considering the scale of any project, this is probably the most labor intensive stage. My Hamilton desk is composed of 34 individual wood pieces. Unfortunately, the previous owner decided to apply a deep brown stain on top of the original faded varnish. They then applied several layers of a hi-gloss varnish. This created a nasty tar-like look. I’m sure when they completed the application, they were very disappointed with the results. The problem with staining and varnishing without properly preparing the surfaces is that the finished product will never look good.


In order to make this piece live again, I had to strip all the pieces down to bare wood. In this case, the wood revealed a beautiful oak grain, but the stain and varnish removal was a project in itself!

I began by using 80 grit sandpaper in a 5 inch hand held belt sanding unit. This tool made deep and clean swatches into the stain and varnish layers. After several overlapped passes, the Oak grains started to reveal their light tan finish. I then proceeded with a series of passes with 120 grit with orbital and palm sanders. These power tools are great for large areas, but this desk has several nooks and crannies that required specialized wood blocks wrapped in sand paper as well. The final stage was hand sanding all the corners, curves and cut-outs. This was extremely necessary as the original brown stain was a terrible contrast against the natural oak finish.

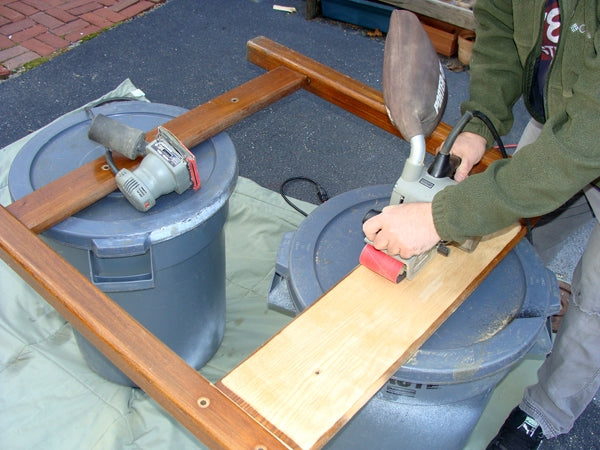

Anyone who has dabbled with stain and varnish removal should be well aware of the toxic hazards associated with breathing the dust and fumes during this process. Please use caution, adequate ventilation and a breathing mask to filter the air. There are a bunch of masks on the market with lots of bells and whistles. I prefer the standard white ones with a metal bar over the nose so you can bend it to really seat the contours of your face. I also like to use my shop filter when I strip wood. There are a wide variety to choose from. As long as you clean the filters regularly, they will offer years of useful service.
The mask is key. If you’re having trouble finding a mask that fits properly, you may want to go with an element or cartridge mask. They have individual filters that are replaceable, but they also have a more durable mouth and nose cover that can fit better than the standard white masks. If you’re wondering if the mask is working well, just blow your nose after doing some sanding. If you have a ton of sawdust on your Kleenex, you may want to find a better fit. Gross I know, but a good indicator.
So 80 hours later, I had revealed the lovely oak grain of every piece. Now for the bad news, removing the dark stain revealed a ton of dings, dents and damage that would require some pretty intensive repairs. In the next section, I will show you how the repair process was accomplished.