Follow along as guest blogger, Doug Murray, goes through the process of refurbishing an old Hamilton drafting table found in a barn! This is part 3, so make sure you start at the beginning with his first post.
Well the good news about getting through major steps in a big project is the sense of accomplishment you feel when achieving goals. After section 2, I was very excited to be done with the varnish and stain removal. The bad news is that people sometimes apply dark stains when they are trying to hide blemishes. In the case of my Hamilton desk, this was an understatement.
Removing the dark stain and varnish did reveal the beautiful bare oak grain. What it also exposed was 60 years of use, wear and tear and abuse. In some ways, when you are restoring classical pieces, it is good to leave the blemishes that show the pieces natural age. Leaving some wear and tear also gives it a “restored” but not overly done sensibility. I’m a big fan of leaving well enough alone, but in the case of this desk, there was a demand for complete refurbishment.
I didn’t feel as though I was devaluing the desk as I made the various repairs. One repair in particular did leave me wondering. On the base of the desk, there was a 7 foot long foot board that was obviously on this desk since day 1. The foot board had a three foot section which was worn down an inch into the wood. This was caused by workers rubbing their shoes on the board for decades. I thought about leaving this wear but decided to repair it out of logical needs.
I had bought this desk to start drawing again. I wanted something with an old-world feel and tons of character. It had to show its age, but it also needed to be refurbished as a sign of respect. I repaired the foot board because I was going to be placing my feet on the wood and creating my own wear. The piece could not take any more abuse without breaking. It was a question of necessity.
As you take on larger, antique projects, you will have to make your own decisions regarding how far you want to take it. In my case, I was taking it back to showroom condition, one step at a time.
The majority of my repairs were on the support legs. You could see where the legs were gouged and scratched by foreign objects. The corners and rounded edges had also seen a lot of wear and tear. There were deep grooves and splintered cuts on almost all of the edges. This damage usually happens to larger pieces when the desk is deconstructed and stored. The damage I had to contend with encompassed every part.

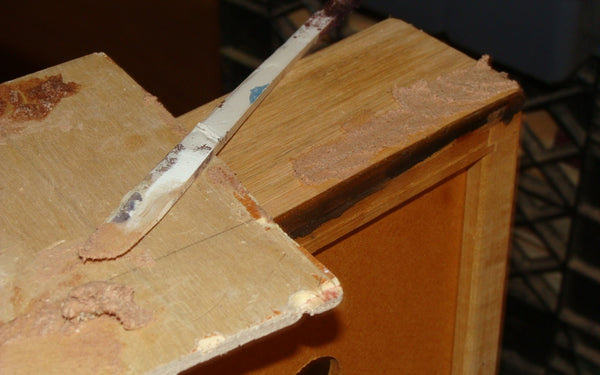
The drawers themselves were the largest heartbreak. It seems as though the drawer fronts had cut outs that allowed them to mate up with the drawer sides. This created a weak point and after years of opening and closing, all of the fronts were cracked and slowly tearing away from the solid oak faces. This required re-gluing the ends of every drawer and clamping them tight. For large repairs, I’m a big fan of Gorilla wood glue. I also like tite-bond when I need more time to set up the parts. If I’m in a delicate area that requires a very fast setting time, I have discovered a new chemical glue called Nexabond 2500 M, instant wood adhesive. This stuff is amazing, but use sparingly, as it sets in about 17 seconds.

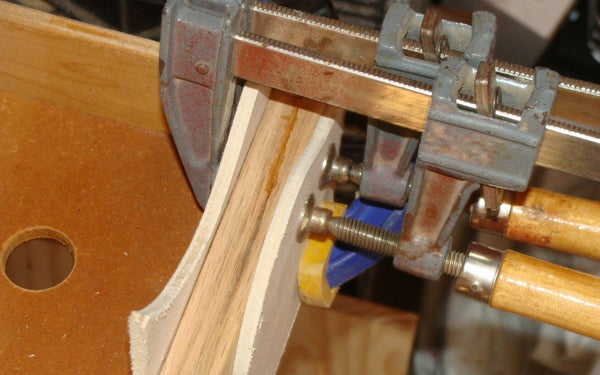
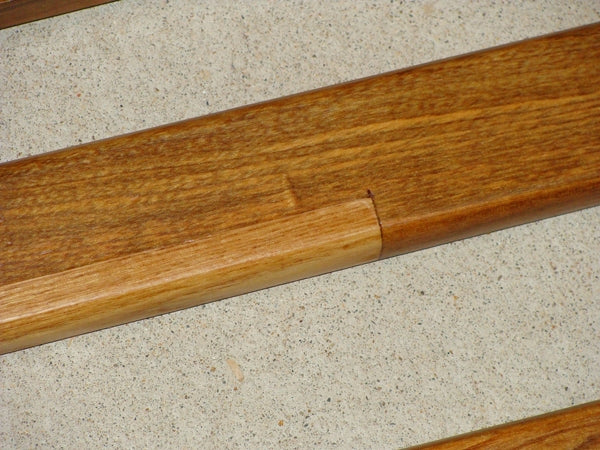
The next step was to repair the foot board. I used my ban saw to chip out a 1 inch by 36 inch length. This was the damage caused by the workers shoes. I then used a modern piece of standard oak, cut to size, and glued and clamped the piece into place with wood glue. I would have loved to have had an antique piece of oak, but it’s almost impossible to get a perfect match, especially when stains and varnishes have been introduced to the wood. The next day I ran a curved router bit across the edge to round both sides and blend the new piece into the length of the board.
I then moved on to the side supports which required me to make notches on the deep gouges. I chiseled out the damaged area and glued in small oak pieces to fill the voids. After drying, I sanded and smoothed these areas using 120 grit sand paper.
There were also a lot of areas where previous owners had nailed and screwed various power strips and tool holders to the side supports. These holes had to be drilled out with a 1/8 bit and filled with oak dowel pins.
For my final repair, I had a drawer face that had been gouged about five inches long, but only 1/16 deep. In this situation I don’t like to remove large sections of wood and glue in new pieces; especially on the front of the drawers where aggressive repairs will be obvious. In this case, I gathered up a handful of the dust from my power sanders. Be careful to not use dust that has varnish and stain residue or your patch will take on the original color and look out of place.
Take a tablespoon of your oak dust and pour on a cap full of wood glue. I prefer slow setting glue for these repairs. Using a wood stick with a nice sharp edge, mix the glue and dust together until you have the consistency of cookie dough. If you have too much glue, the repair will look like plastic filler. Not enough glue, and the filler will not be able to hold together. This also will create a porous look when dry. Cookie dough is a good reference as it is pliable enough to form without being too moist.
I used my wood tool to spread the filler across the damaged area. Be sure to use a lot of force to mash the filler into every nook of the gouge. As you press, slide the tool and spread the filler across the length of the repair. Make sure that your filler is not perfectly flush with the board. You will need it to build it up a bit. This is important because after it dries, you will have to sand it down. If you spread your filler flush with the board, you will notice tiny pores in the repair as you sand it down.
With the repair work done, it’s time for final sanding, stain application and a protective coat of varnish. Stay tuned for section 4, coming soon!